Understanding Vapor Barrier Installation
What is a Vapor Barrier?
A vapor barrier is a material used to prevent moisture from passing from one area to another, especially in indoor environments. Often made of plastic or foil-like materials, vapor barriers work by creating a barrier that moisture cannot easily penetrate. This is particularly crucial in areas like crawl spaces, where excess moisture can lead to a variety of problems, including mold growth, structural damage, and poor indoor air quality.
Importance of Vapor Barrier Installation
Installing a vapor barrier is essential for protecting your home from moisture-related issues. Without a proper barrier, moisture from the ground can rise, affecting wooden structures, insulation, and HVAC systems. This can lead to costly repairs, health risks from mold and mildew, and increased energy bills due to reduced insulation effectiveness. Therefore, understanding the role of a vapor barrier is vital for homeowners looking to maintain their property’s integrity and comfort. A well-executed Vapor Barrier Installation can provide significant long-term benefits.
Types of Vapor Barriers Available
There are several types of vapor barriers available, each designed for specific applications:
- Polyethylene Film: The most common type, generally 6 mil in thickness, it is affordable and easy to install.
- Reflective Foil: This barrier not only prevents moisture but can also reflect heat away from the home.
- Spray Adhesives: Used on foundations and walls, these create an effective barrier but may require professional installation.
- Waterproof Concrete Additives: These additives can be mixed into concrete to enhance its moisture-resistant properties.
Preparation for Vapor Barrier Installation
Evaluating the Crawl Space
Before installing a vapor barrier, thoroughly evaluate your crawl space. Check for existing moisture issues, signs of mold, or pests. Ensure that the area is clear of debris and that there is proper drainage. Any existing water damage must be addressed before installation, as applying a vapor barrier over a problematic area will not solve underlying issues.
Necessary Tools and Materials
Gathering the right tools and materials is essential for a successful vapor barrier installation. You will need:
- Polyethylene sheeting (6 mil or thicker)
- Utility knife or scissors for cutting the sheeting
- Tape measure to ensure proper sizing
- Construction adhesive or tape for sealing seams
- Stapler for securing the barrier to wooden structures
- Gloves, mask, and knee pads for protection during installation
Assessing Moisture Levels
Assessing moisture levels in your crawl space is critical to the success of your installation. Use a moisture meter to measure humidity levels, and check for any water accumulation. Ideally, the humidity should remain below 60%. If levels exceed this, consider additional solutions like dehumidifiers before installation to ensure the longevity of the vapor barrier.
Step-by-Step Guide to Vapor Barrier Installation
How to Prepare the Area
Start by cleaning the crawl space thoroughly. Remove any debris, old insulation, or sharp objects that might damage the vapor barrier. If you identify any leaks or drainage problems, address these issues before proceeding. This preparation ensures a clean and safe workspace for installation.
Installing the Vapor Barrier
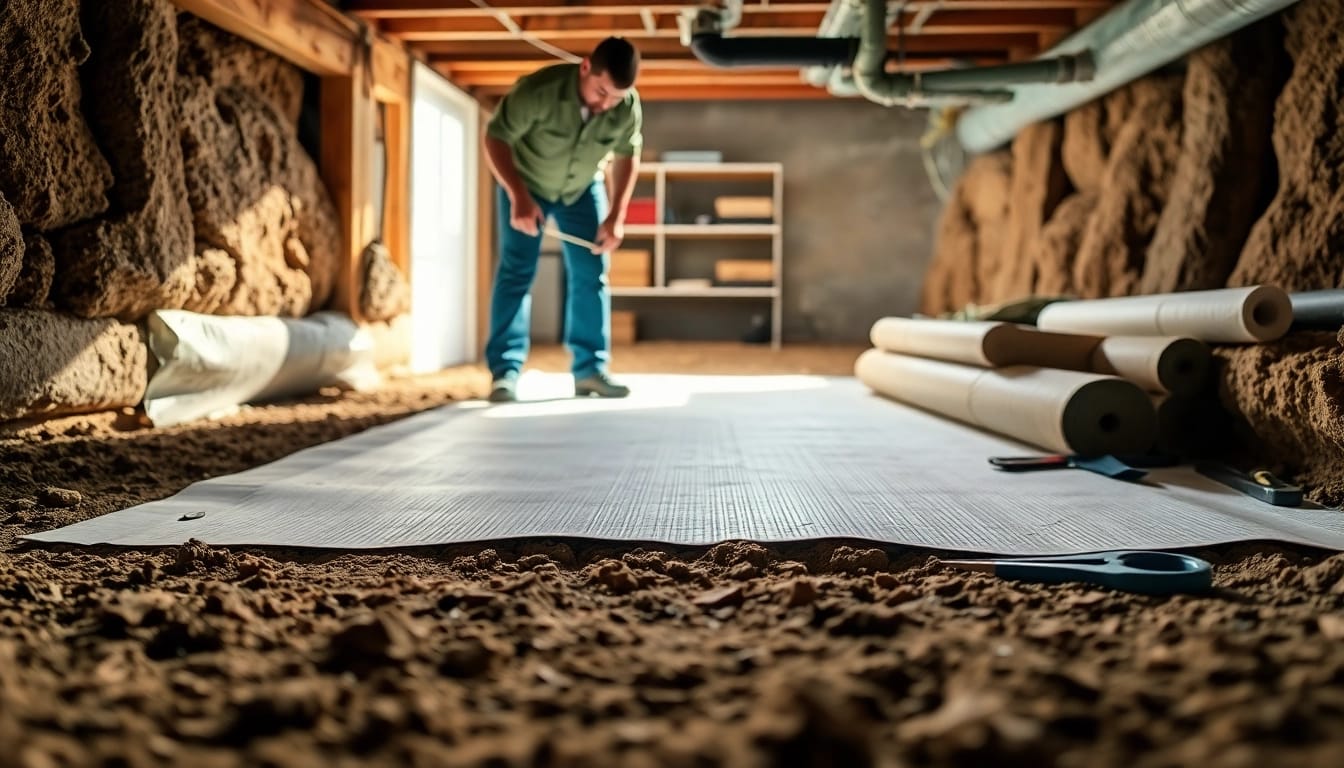
Begin by measuring the crawl space dimensions to determine the amount of polyethylene sheeting required. Roll out the sheeting and cut it to size, allowing extra for overlap. Lay it down flat, starting from one end of the crawl space and working your way across to avoid wrinkles. Make sure to cover all exposed ground, and extend sheets up the walls a minimum of 6 inches.
Securing and Sealing the Barrier
Once the vapor barrier is in place, secure it using construction adhesive or staples. Where sheets overlap, apply tape or adhesive to seal the joints fully. Ensure that all seams are airtight, as any gaps can allow moisture penetration, negating the benefits of installation.
Common Challenges in Vapor Barrier Installation
Identifying Potential Issues
Despite being a straightforward installation process, there can be challenges like unpredictable shifts in humidity or inadequate preparation of the crawl space. Homeowners might also encounter difficulties securing seams, especially in tight spaces.
Solutions for Common Problems
If you experience difficulties with wrinkling or tearing of the vapor barrier, ensure that it is adequately smoothed out before securing. For moisture issues, rechecking your humidity levels and employing dehumidifiers may be necessary. In cases where pests invade, consider professional pest management strategies before and after installation.
When to Seek Professional Help
If you discover significant mold growth, flooding issues, or structural concerns, it may be best to seek professional assistance. Professionals can provide comprehensive solutions, ensuring that both installation is performed adequately and long-term moisture issues are addressed.
FAQs About Vapor Barrier Installation
How long does a vapor barrier last?
A vapor barrier can last anywhere from 10 to 25 years with proper maintenance, depending on the type of material used and environmental conditions.
Can I install a vapor barrier myself?
Yes, many homeowners can successfully install a vapor barrier themselves, provided they follow guidelines and take proper safety precautions.
What types of vapor barriers are best for crawl spaces?
Polyethylene sheeting is the most common and effective vapor barrier for crawl spaces, especially when layered and sealed correctly.
How do I maintain a vapor barrier?
Regularly check for tears or damage, ensuring that the area remains dry. Repair any issues promptly to maintain its function.
What are the signs that my vapor barrier needs repair?
Signs include visible tears, dampness in the crawl space, mold growth, or musty odors. Address these issues immediately to prevent further damage.


